Get all the alt codes upto 200 characters,you can get upto 250 numbers
You should use by using LEFT ALT and NUM lock keys(right)
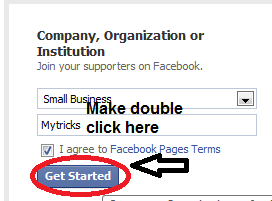
SAVE THIS IMAGE FOR FUTURE USE

Save image and you are done.

 If you want add the email subscription form in blogger at the sticky bar.These can increase the subscribers to your blog.Which can make increase in traffic.I think it look good to your blogger.
 Earlier i have posted the css3 animated jquery drop down menu1 for blogger.Today i came to give the new drop down menu for mmb respected blog visitors.This new drop down menu2 is looks very open when mouse hover at its sub class and looks good very stylish open space drop down with borders.


 Make the customization work on the your blogger comment form with different stylish backgrounds on the border with css.These can make your template look a beautiful to your blog visitors when they commenting on your blogger.so,what you are waiting make your blogger comment form to look different by follow my tutorials.
 you have seen the add to blogger button in some blogs.you can get it to your blogger.Just add the details and html/java script in the below boxes and click generate button and get the code and add it in your blogger post.Then you can give html/java script by pressing only add to blogger button at your blogger can send the hidden information directly to your visitors blogger.


<b:section class='footer' id='footer'/><div id='footer-columns'> <div class='column1'> <b:section class='addwidget' id='col1' preferred='yes' style='float:left;'> </b:section> </div> <div class='column2'> <b:section class='addwidget' id='col2' preferred='yes' style='float:left;'> </b:section> </div> <div class='column3'> <b:section class='addwidget' id='col3' preferred='yes' style='float:right;'> </b:section> </div> <div style='clear:both;'/> </div> <b:section class='footer' id='footer'/>